It’s not uncommon for an architect to standardise all of their perimeter details across a project to one detail type that is seismically correct. But is this the most cost and time efficient solution? Our experience suggests not.
In the past, we have seen clients apply this method to every one of their projects, resulting in their subcontractors spending approximately 3 – 4 times as long on every single room without necessarily questioning why, assuming that the architect chose this method for architectural reasons.
In a recent project that we were engaged in during the build phase, this one-stop approach resulted in a project taking twice as long to complete and costing around 20% more than it should have. By engaging a seismic interiors engineer during the design phase of a project, architects will receive a series of design options to help them avoid any unforeseen risks to their project timeline and budget.
So here’s what you need to know about perimeter design.
Firstly, what is perimeter design?
Perimeter design is required for any ceiling type and concerns the point where the ceiling meets a wall or partition (aka where the edges meet). This design also considers how the perimeter connection will perform when subjected to lateral loads due to seismic movement.
Why are perimeters are so important?
As mentioned above, perimeters connect 2 different interior elements, typically ceilings and partitions. Through the perimeter connection we are able to control whether the elements act/move independently or together.
The whole point of seismic design is that we are allowing things to move in a controlled fashion. So in the case of an earthquake, interior building elements are prevented from moving in an “‘unplanned” way and failing.
The two most commonly used methods are; fix-float and braced ceilings.
These two methods do slightly different things, however their features are relatively similar.
The fix-float method is the quickest and easiest method to install as minimal additional materials are required, perimeter connections and seismic clips are all that is needed. Unfortunately this bracing method can only be used for small or lightweight ceilings as the seismic load increases with the overall ceiling weight causing the perimeter connections to become overloaded above a certain ceiling area.
When the fix-float methods are not an option, the ceiling must then be braced to the structure above. This is typically done through steel stud bracing. The bracing method is a lot more labour/ material intensive due to the additional braces and the time associated with installing them. The advantage of this method is that essentially all ceilings, no matter the size or weight, can be braced in this way.
To read about these methods in further detail, please refer to our article about seismic bracing here.
How much should perimeters move?
The size of the floating perimeter connection is very important for back-braced ceilings as it needs to account for the differential movement between the floor above, which the ceiling is braced to and the floor below which the surrounding partitions are fixed to. The inter-story drift allowance in New Zealand is up to 2.5% and up to 1.5% in Australia.Therefore, if we have a back-braced ceiling with 1.0m of plenum we would need to allow for 25mm of movement at the perimeter connection in NZ and 15mm in Australia.
For a fix-float ceiling, the ceiling is only braced to the surrounding walls which are rigidly fixed to the floor below. As there is no bracing to the floor above, we do not need to allow for inter-story drift. Typically a 20mm edge gap will be specified on floating connections to allow for the different period of shaking opposing walls may experience.
What is minor damage versus major damage?
In the case of an earthquake, we consider certain damage levels to be acceptable. For example, when we are designing ceilings that are able to move, we expect the ceiling and wall to move independently. Acceptable damage here would be superficial cracks in the plaster, whereas unacceptable damage would be a collapsed ceiling.
A seismically compliant ceiling grid structure is designed to move to allow for inter-story drift (as explained above) but in order to achieve the desired aesthetic look at the perimeter it is generally not OK to have 25+mm gaps in the ceiling lining at the floating edges of a room.
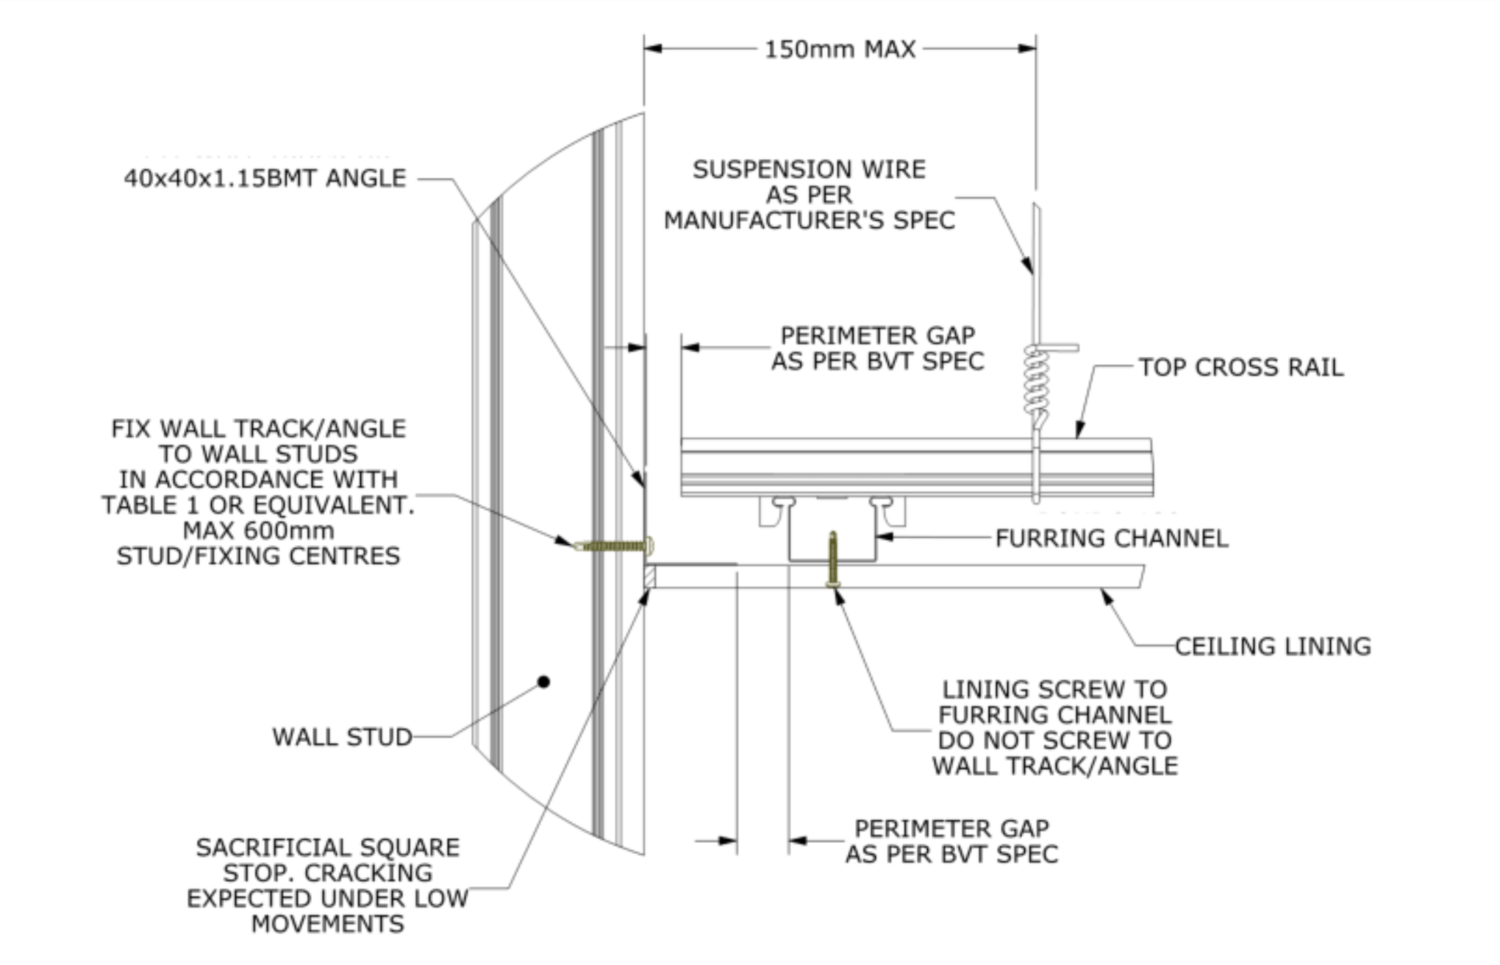
Figure 1: Channel Floating Connection
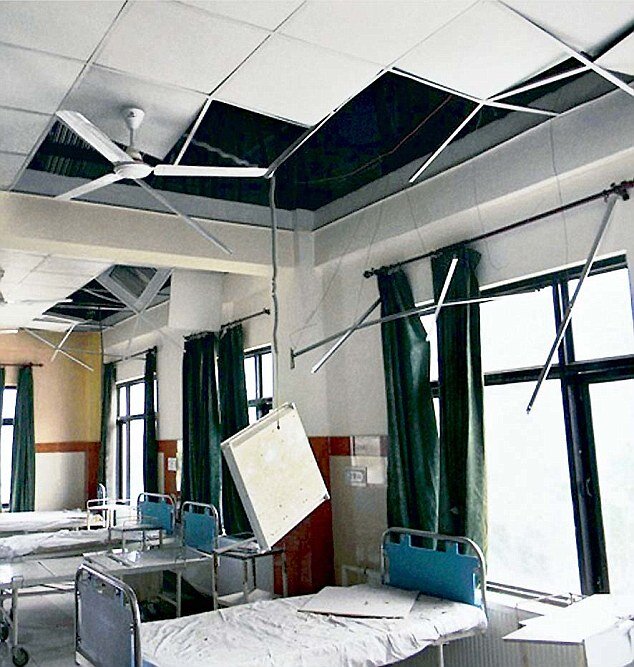
Figure 2: Source: dailymail.co.uk
The standard solution to this is to bring the ceiling lining all the way up to the perimeter and square stopping it to have a good looking finish but still allowing movement in the metal ceiling grid/structure above.
As the ceiling structure is still able to move we can expect some minor cracking in the plasterboard lining around a floating perimeter connection. A typical furring channel floating connection is shown above in Figure 1.
This is a far better outcome than if we did not allow for the movement which could cause the ceiling structure itself to break and potentially fall.
What are the solutions? A simple way to solve this is through the use of negative details at the perimeters (Fig 3.), this allows for movement of the plasterboard to prevent cracking.

Figure 3: Negative detail construction
Exceptions and Considerations:
This article refers mostly to plaster ceilings. Whilst we haven’t discussed two way tiling grid ceilings, the same principles apply but the perimeter solutions are better defined with manufacturer designed clips. It’s also important to note that any fixed perimeter connections need a suitable partition or wall structure to hold it. These must be considered in the design, hence why you can’t design in isolation.
Often walls and partitions are built lightweight, with no consideration for ceiling load. If no consideration is made for ceiling loads then we are unable to adequately transfer seismic loads through the walls to the building structure and we cannot use the fix- float method. This leaves us with back bracing as the only option even for small simple ceilings. Back-bracing adds a lot more time and materials to the build.
Your hangers at a minimum it needs to be a certain distance from the edge. Each manufacturer of the grid will list this in their design manuals. When in doubt 150mms will cover all bases.
We understand that there are many different viewpoints on how to tackle perimeters, however these are the considerations we feel important to be made at the onset of a project. Feel free to share your thoughts with us, or get in touch if you have any further questions about anything you’ve read or a project you would like assistance with.
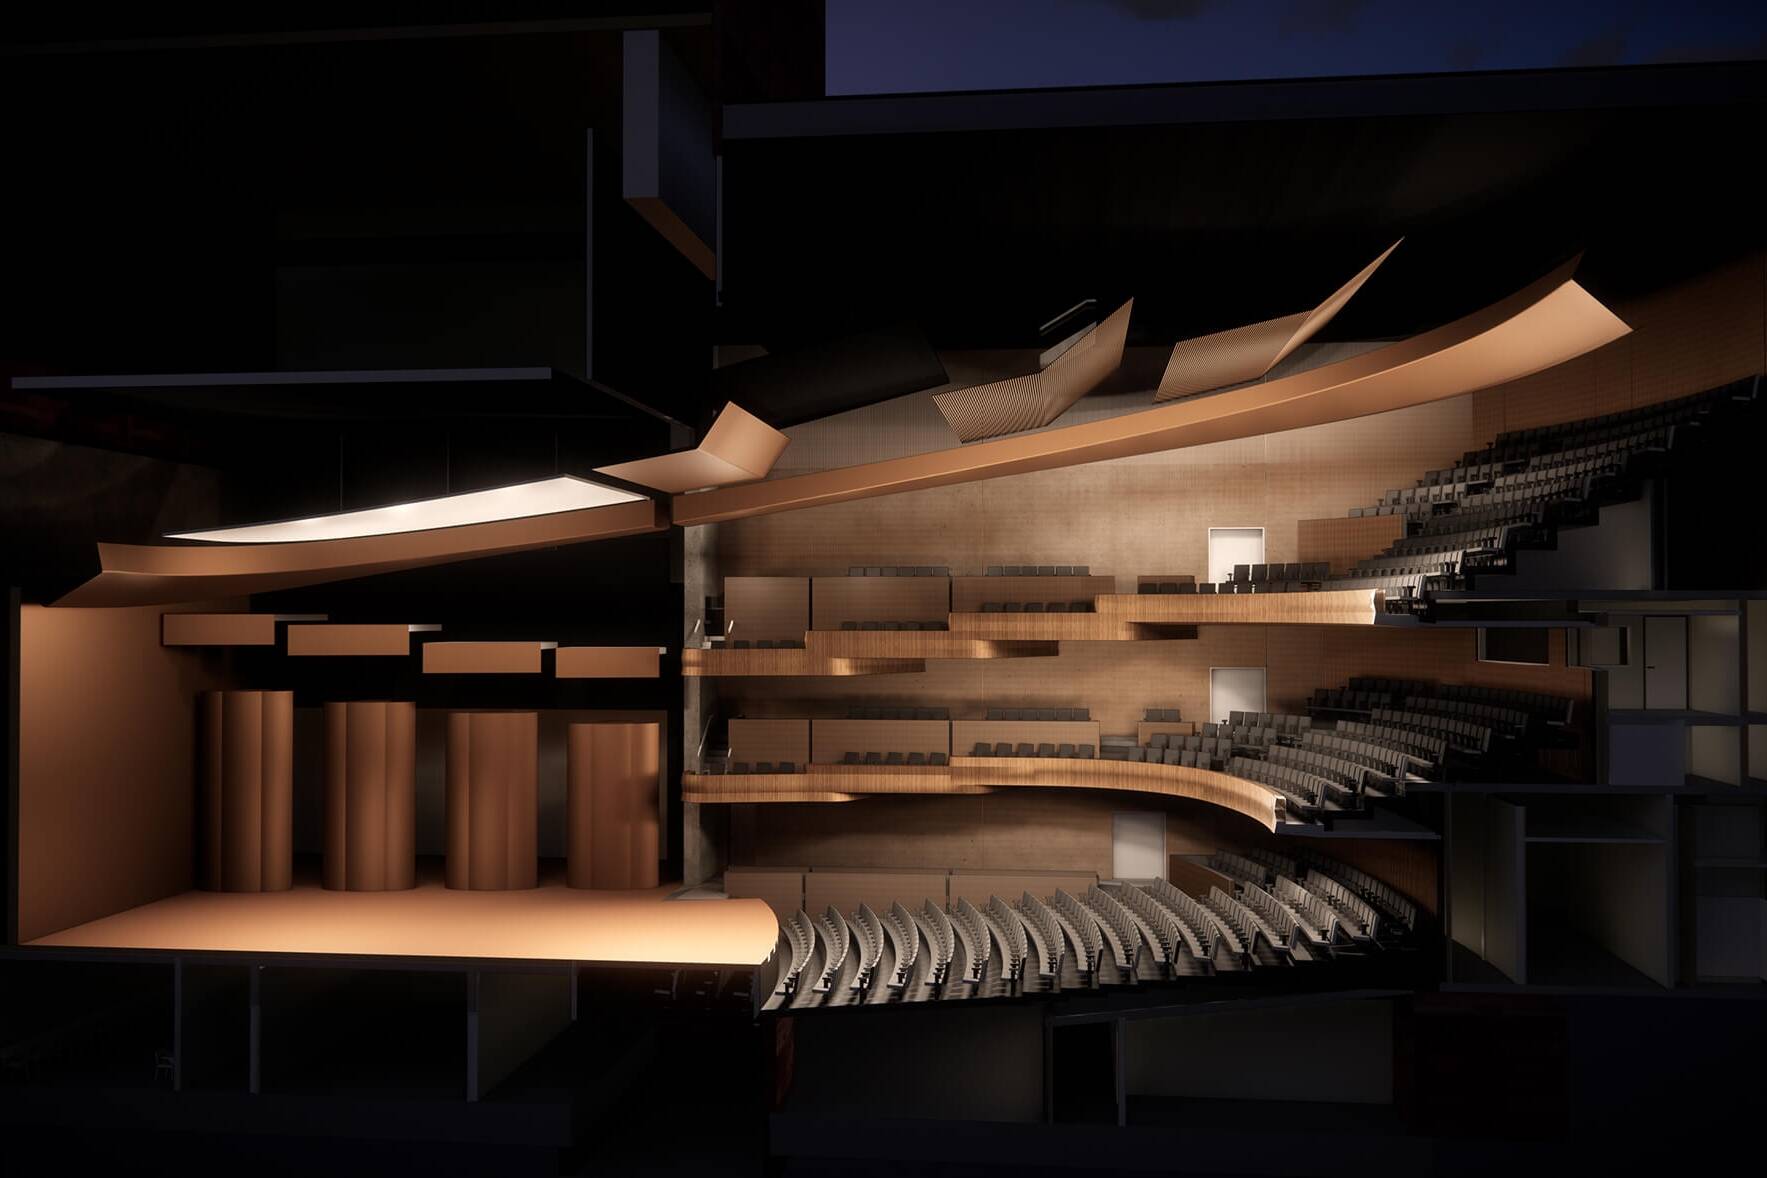
BESPOKE INTERIOR SEISMIC DESIGN FOR WAIKATO REGIONAL THEATRE
One of the stand-out features of the performing arts centre is its main hall, where large sound reflectors are…

Understanding Seismic Assessment of existing Non-Structural Elements in Commercial Interiors
In the latest installment of Team Brevity's technical webinar series, we delved into the critical topic of seismic…

NAVIGATING EXPECTATIONS: THE REALITY OF BIM FOR INTERIORS
The engineering details for interiors tends to be short, fast and with the potential for many clashes, resulting in a…